
Intervals are the building blocks of music. They will help you understand things like scales, chords, melodies, chord progressions, and much more.
Not only that, intervals on guitar are also the key to understanding and navigating your fretboard.
So, in this guide, you’ll learn what intervals are, how they work on guitar, and why intervals are so useful to learn! Lastly, I'll give you a 4-step plan that makes it easier to learn them.

Make learning intervals easier with my Guitar Intervals Cheat Sheet.
This cheat sheet breaks down the four most important intervals to get started with, and where to find them on the fretboard.

Plus, you'll practice these intervals in TAB exercises to lock their sound into your ears and their positions into muscle memory.
+Bonus: I’ll also share 3 mistakes guitarists make when learning music theory (and how to avoid them)
Don’t miss out and click below to get your FREE guitar interval resources!
Section 1
What are intervals?
Let’s look at an example on the fretboard.
Say we’re playing the first fret of the low E string, like this:
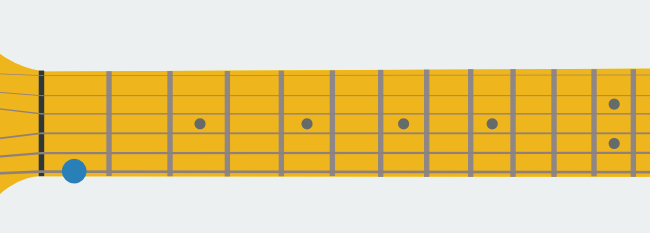
Next, we decide to play the fifth fret on the low E string:
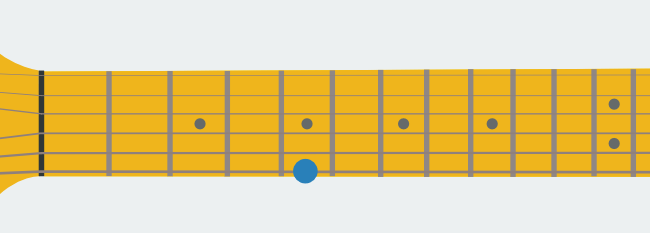
There’s a certain distance between these two notes, right? That distance is what we call an interval.
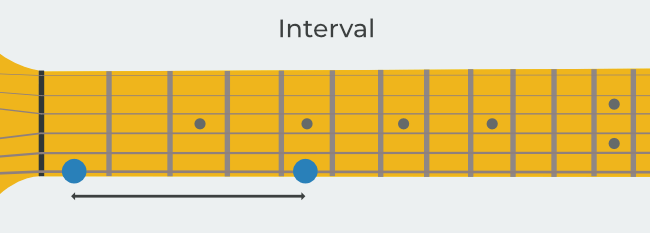
In this example, the distance between the two notes is four frets. But saying ‘the interval is four frets’, wouldn’t make much sense for non-guitarists.
So instead, we have special names for intervals. In this case, the interval is called a ‘major third’.
Here are some other interval names that you might’ve heard before:
- Minor seventh
- Perfect fifth
- Octave
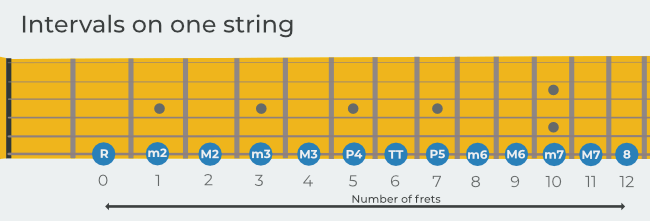
In total, there are twelve different intervals. I’ll give you the full list, which will look a little overwhelming. Don’t worry though, we’ll go into how to best learn these intervals a bit later in this article. (Spoiler: don’t learn them all at once!) For now, I just want to introduce the names to you, and point out a few things that will be useful later in this article.
Now, you might wonder: what's the logic behind these names? Right now though, the most important thing is to notice that there's some structure to these names. We can identify a few patterns:
- There seems to be some sort of counting system in these intervals, where some intervals are ‘seconds’ or ‘thirds’ and others are ‘sixths’ and ‘sevenths’.
- Some intervals are called ‘major’, whereas others are ‘minor’.
- We have two intervals that are ‘perfect’
- Then we have a weird one, the tritone.
It’s useful to not have to write out the full name of an interval. So we often use shorthand names for the intervals. Here’s a quick explainer of the system I recommend:
m = minor
M = major
P = perfect
TT = tritone
And here’s the table with the shorthand notation:
Again, there’s no need to memorise all this right now. The most important thing at this point is that you know there are twelve intervals and that you've seen their names.
Next up you'll learn how to play these intervals on guitar!
Section 2
How to play intervals on guitar
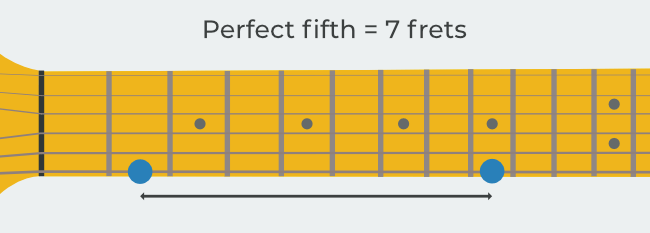
So let’s look at an example. We’ll take the perfect fifth interval, which is the same distance as seven frets on the guitar fretboard.
That means if we first play the the open E string and then want to play the note that’s a perfect fifth higher, we’d need to go up seven frets and play the seventh fret on the low E string.
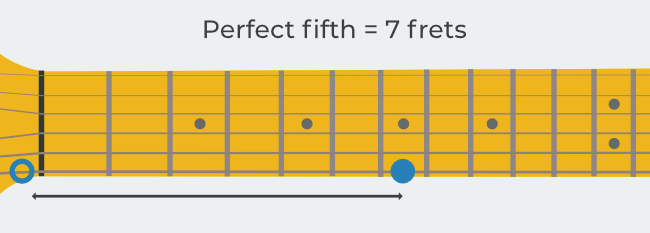
That’s how you play a perfect fifth interval on guitar!
Now, we can do the same thing from any place on the fretboard. For example, if we start on the second fret of the low E string, we could play a perfect fifth like this.
Of course, this same logic applies to any of our intervals. Check it out:
We can also play intervals on different strings. In many cases, such as with our perfect fifth, this is actually easier and more convenient to play.
Here’s a quick excerpt from my course Music Theory from Scratch that explains how that works:
Using this logic, you can play intervals all over the fretboard! There's just one exception you need to know about. When you play an interval that crosses between the G string and the B string, that isn't the same as five frets (as with all the other strings), but just four frets! So, to give an example, here's how you would play a perfect fifth that's on the G and B string:
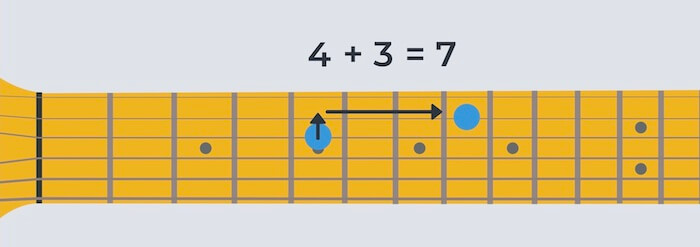
And that’s how intervals work on the fretboard! Naturally, all of this is covered in Music Theory from Scratch. If you're a StringKick All Access Member, you can get started with the course straight away to get step-by-step instructions and hands-on practice to master intervals on guitar.
Next, it's high time that we see how we can use intervals. On to the next section!
Section 3
How to use intervals
There’s a lot to be said about this. Intervals are the building blocks of music. We need intervals to understand everything from chords, to scales, to chord progressions and melodies.
The easiest way to understand this is to check out a quick example. We’ll see how we can understand chord construction using our knowledge of intervals. Quick disclaimer: if you’re very new to intervals, I wouldn’t expect you to understand all the details of the following explanation. What’s most important here is to see that intervals can help us build chords.
As you may know, we have different ‘chord types’. Some chords sound happy and uplifting, while others sound sad and gloomy. So, what determines the ‘mood’ of a chord? Well, basically, every chord type has a ‘recipe’. And that’s where our intervals come in. For example, the recipe for a major chord is:
- Root note
- Major third
- Perfect fifth
So, how exactly does this work? Let’s check it out on the fretboard. We’ll create a C chord using our knowledge of intervals.
We’ll start with the root note. The root note is the lowest note of the chord and determines the name of the chord. So for our C major chord, it needs to be a C. We’ll play it on the third fret of the A string.
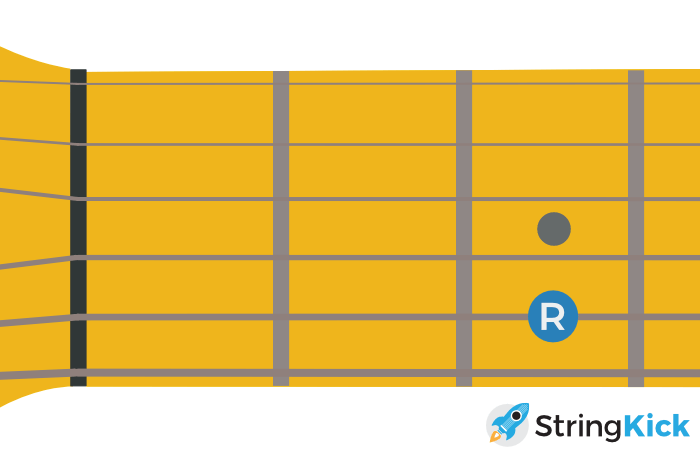
Our root note is the foundation for the chord. From this note, we’ll add in other ‘ingredients’ to complete our ‘recipe’.
We’ll start by adding a note that’s a major third higher than the root note.
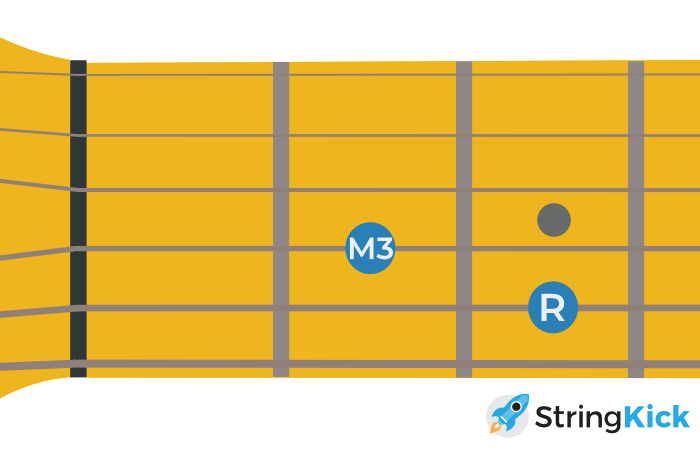
Next, we’ll add a note that’s a perfect fifth higher than the root note:
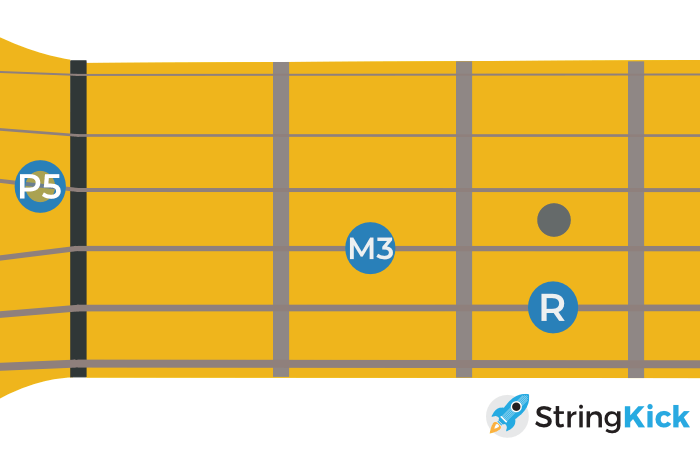
And there we go. If you play these three notes together, we have a C major chord!
Now, perhaps you’re thinking: hey, that’s not how I learned the C chord! And you’re right, we usually add more strings when playing a C chord. But those strings, don’t actually add any new ‘ingredients’ into the mix. Check it out:
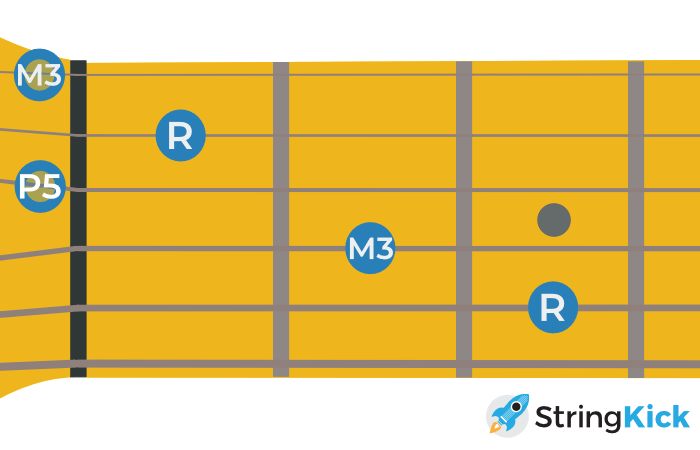
As you can see, those extra strings add another root note and major third. They’re the same ‘ingredient’, just higher.
So, intervals help us understand how chords are constructed. But that's just one example. They'll also help you understand melodies, scales and chord progressions.
To see how intervals can help you understand how melodies are constructed, check out the free sample version of Music Theory from Scratch.
In it, you'll learn to play three different intervals. We’ll then use that knowledge to analyse a simple guitar riff. Next, we’ll use theory to change that riff to sound better.
One question remains for us: how can you best learn learn intervals? That’s what we’ll tackle in the last section.
Section 4
How to learn guitar intervals
The challenge with theory is to keep it practical and useful. With enough time and effort, you can probably memorise the list of intervals I gave you earlier. But that probably wouldn’t be a lot of fun, and it wouldn’t really help you in your playing.
So, the approach I recommend is to take a few intervals at a time and to apply them to the fretboard, using real-life, musical situations. Let me give you a quick outline of how that would look:
1. Learn m3, M3, P5 and P8
You can then use these intervals to build and analyse major and minor chords. Here’s a quick excerpt from Music Theory from Scratch that shows you how you’d do that.
2. Learn m7 and M7
With these two intervals added, you can build and analyse seventh chords, such as Amaj7, D7 or Bm7. The approach is the same as in the first step, we just have two extra intervals. By the way, this brings us up to 6 intervals, which is half of them already!
3. Learn M2, P4 and M6
With these intervals added, you can analyse melodies based on the major scale.
4. Learn m2, TT and m6
To complete our list of intervals, we’ll learn these final three. Now, we can analyse any scale or melody we like!
And that’s it! Hopefully, this article has given you a rough idea of what intervals are, why they’re useful and how to learn them. The next step is to start becoming comfortable with them. Take it a few intervals at a time, and you’ll get this down in no time. As always, if you have questions about this article, .
And that’s it! Hopefully, this article has given you a rough idea of what intervals are, why they’re useful and how to learn them. The next step is to start becoming comfortable with them. Take it a few intervals at a time, and you’ll get this down in no time. Also, consider joining StringKick! You’ll get access to all the courses on the site, many of which are all about mastering music theory. Learn more about the All Access Membership here. I’d love to see you on the inside!


![Title image for Learn Music Theory for Guitar [5-step Roadmap]](https://www.stringkick.com/wp-content/uploads/2022/02/Music-Theory-for-Guitar-Main.png)
![Title image for How to Read Chord Names and Symbols [Complete Guide]](https://www.stringkick.com/wp-content/uploads/2018/02/Read-Chord-Names-Symbols-Title-Image.png)


